Linux (CentOS7.5)에서 MariaDB 설치
Linux MariaDB 설치
Linux(CentOS7.5)에서 MariaDB를 설치하여 봅시다. Mariadb는 오라클에서 MySQL을 인수함에 따라 이에 대한 반발로 MySQL을 모태로 만들어진 DBMS 입니다.
설치환경
- CentOS Linux release 7.5.1804 (Core)
- 10.3.9-MariaDB MariaDB Server
repo 파일생성
yum 에서 패키지 위치를 참고할 수 있도록 repo파일을 생성합니다.
$ cd /etc/yum.repos.d/
$ curl -sS https://downloads.mariadb.com/MariaDB/mariadb_repo_setup | sudo bash
아래와 같이 mariadb.repo 파일이 생성됩니다.
$ ls -al
-rw-r--r--  1 root root  794  9월 16 17:56 mariadb.repo

$ cat mariadb.repo
[mariadb-main]
name = MariaDB Server
baseurl = https://downloads.mariadb.com/MariaDB/mariadb-10.3/yum/rhel/$releasever/$basearch
gpgkey = file:///etc/pki/rpm-gpg/MariaDB-Server-GPG-KEY
gpgcheck = 1
enabled = 1

[mariadb-maxscale]
# To use the latest stable release of MaxScale, use "latest" as the version
# To use the latest beta (or stable if no current beta) release of MaxScale, use "beta" as the version
name = MariaDB MaxScale
baseurl = https://downloads.mariadb.com/MaxScale/2.2/centos/$releasever/$basearch
gpgkey = file:///etc/pki/rpm-gpg/MariaDB-MaxScale-GPG-KEY
gpgcheck = 1
enabled = 1

[mariadb-tools]
name = MariaDB Tools
baseurl = https://downloads.mariadb.com/Tools/rhel/$releasever/$basearch
gpgkey = file:///etc/pki/rpm-gpg/MariaDB-Enterprise-GPG-KEY
gpgcheck = 1
enabled = 1
MraidDB 설치
이제 본격적으로 실치를 진행합니다. 아래 yum명령어로 설치를 시작합니다.
$ yum install MariaDB-server
아래와 같이 yum에서 패키지 의존성을 검사하고 설치할 것이냐고 묻습니다.
======================================================================================================================
 Package                      Arch                 Version                           Repository                  Size
======================================================================================================================
Installing:
 MariaDB-server               x86_64               10.3.9-1.el7.centos               mariadb-main               123 M

Transaction Summary
======================================================================================================================
Install  1 Package

Total download size: 123 M
Installed size: 515 M
Is this ok [y/d/N]: y
y를 누르고 설치를 진행합니다.
Downloading packages:
MariaDB-10.3.9-centos73-x86_64-server.rpm                                                      | 123 MB  00:00:23
Running transaction check
Running transaction test
Transaction test succeeded
Running transaction
  Installing : MariaDB-server-10.3.9-1.el7.centos.x86_64                                                          1/1
  Verifying  : MariaDB-server-10.3.9-1.el7.centos.x86_64                                                          1/1

Installed:
  MariaDB-server.x86_64 0:10.3.9-1.el7.centos
MariaDB 기동 정지 명령어
기동
$ systemctl start mariadb
정지
$ systemctl stop mariadb
시스템실행시 자동실행
$ systemctl enable mariadb
자동실행 등록 확인
$ chkconfig --list mysql
위에 명령어를 이용하여 MariaDB를 기동 정지 할 수 있습니다. 특히 MariaDB를 서버로 사용한다면 마지막에 시스템실행시 자동실행을 등록해두면 편리합니다.
MariaDB root 암호 및 기본 보안설정
MariaDB의 root패스워드를 지정하거나 외부에서 접속을 허용하는 설정을 한번에 진행 합니다.
$ mysql_secure_installation
위와 같이 보안설정 명령어를 수행하게 되면
NOTE: RUNNING ALL PARTS OF THIS SCRIPT IS RECOMMENDED FOR ALL MariaDB
      SERVERS IN PRODUCTION USE!  PLEASE READ EACH STEP CAREFULLY!

In order to log into MariaDB to secure it, we'll need the current
password for the root user.  If you've just installed MariaDB, and
you haven't set the root password yet, the password will be blank,
so you should just press enter here.

Enter current password for root (enter for none):
OK, successfully used password, moving on...

Setting the root password ensures that nobody can log into the MariaDB
root user without the proper authorisation.

You already have a root password set, so you can safely answer 'n'.
root 패스워드를 변경하시겠습니까?
Change the root password? [Y/n] y
New password:
Re-enter new password:
Password updated successfully!
Reloading privilege tables..
 ... Success!
익명 유저를 삭제하시겠습니까?
By default, a MariaDB installation has an anonymous user, allowing anyone
to log into MariaDB without having to have a user account created for
them.  This is intended only for testing, and to make the installation
go a bit smoother.  You should remove them before moving into a
production environment.

Remove anonymous users? [Y/n] y
 ... Success!
root 계정의 외부 접속을 막겠습니까?
Normally, root should only be allowed to connect from 'localhost'.  This
ensures that someone cannot guess at the root password from the network.

Disallow root login remotely? [Y/n] n
 ... skipping.
자동생성되는 test Database를 삭제하시겠습니까?
By default, MariaDB comes with a database named 'test' that anyone can
access.  This is also intended only for testing, and should be removed
before moving into a production environment.

Remove test database and access to it? [Y/n] y
 - Dropping test database...
 ... Success!
 - Removing privileges on test database...
 ... Success!
변경된 설정을 재로딩 하겠습니까?
Reloading the privilege tables will ensure that all changes made so far
will take effect immediately.

Reload privilege tables now? [Y/n] y
 ... Success!

Cleaning up...

All done!  If you've completed all of the above steps, your MariaDB
installation should now be secure.

Thanks for using MariaDB!
이렇게 여러가지 보안세팅을 한번에 적용할 수 있게 해줍니다.
각자 환경에 맞게 y/n를 입력하도록 합시다.
포트변경 및 방화벽 오픈
기본포트인 3306 대신 다른 포트를 사용하고 싶다면
$ vi /etc/my.cnf.d/server.cnf
아래 [mysqld] 데몬 설정에 port를 지정하여줍니다.
# this is only for the mysqld standalone daemon
[mysqld]
port=3306
변경된 설정 적용을 위해서 재기동합니다.
$ systemctl start mariadb
$ systemctl start mariadb
포트를 지정하여 방화벽을 오픈합니다. –permanent옵션으로 영구적용 합니다.
$ firewall-cmd --permanent --add-port=3306/tcp
MariaDB 접속 및 DATABASE, USER 생성
MariaDB를 root로 접속합니다.
$ mysql -u root -p
패스워드를 입력합니다.
Enter password:
Welcome to the MariaDB monitor.  Commands end with ; or \g.
Your MariaDB connection id is 29
Server version: 10.3.9-MariaDB MariaDB Server

Copyright (c) 2000, 2018, Oracle, MariaDB Corporation Ab and others.

Type 'help;' or '\h' for help. Type '\c' to clear the current input statement.
사용할 DATABASE를 생성합니다. 제 경우 sampleDB로 입력하였습니다.
MariaDB [(none)]> CREATE DATABASE sampleDB DEFAULT CHARACTER SET utf8;
USER를 생성합니다.
‘sampleUser’@’%’ 에서 '%'는 모든 외부IP에서 접근을 허용한다는 의미 입니다.
MariaDB [(none)]> CREATE user 'sampleUser'@'%' identified by '1234';
USER에게 DATABASE의 접근권한을 부여합니다.
MariaDB [(none)]> grant all privileges on sampleDB.* to 'sampleUser'@'%';
변경된 내역을 DB에 반영합니다.
MariaDB [(none)]> flush privileges;
외부에서 접속테스트
세팅을 완료 후 로컬에서 접속을 시도해보았습니다.
MysqlWorkbench를 통해서 정상적으로 접속 확인 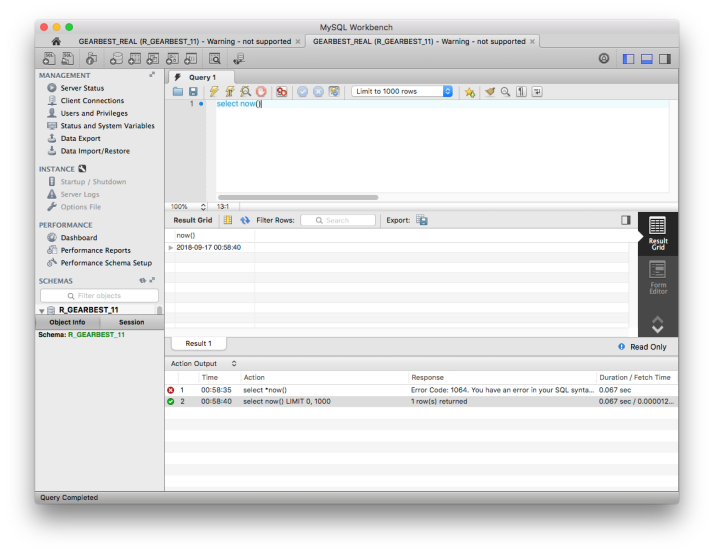
만약 로컬에서 접속 시 아래와 같이 에러가 발생한다면
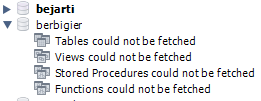
- Tablse could not be fetched
- Views could not be fetched
- Stored Procedures could not be fetched
- Functions could not be fetched
서버에서 아래 명령어로 해결이 가능하다.
$ mysql_upgrade -u root -p
